

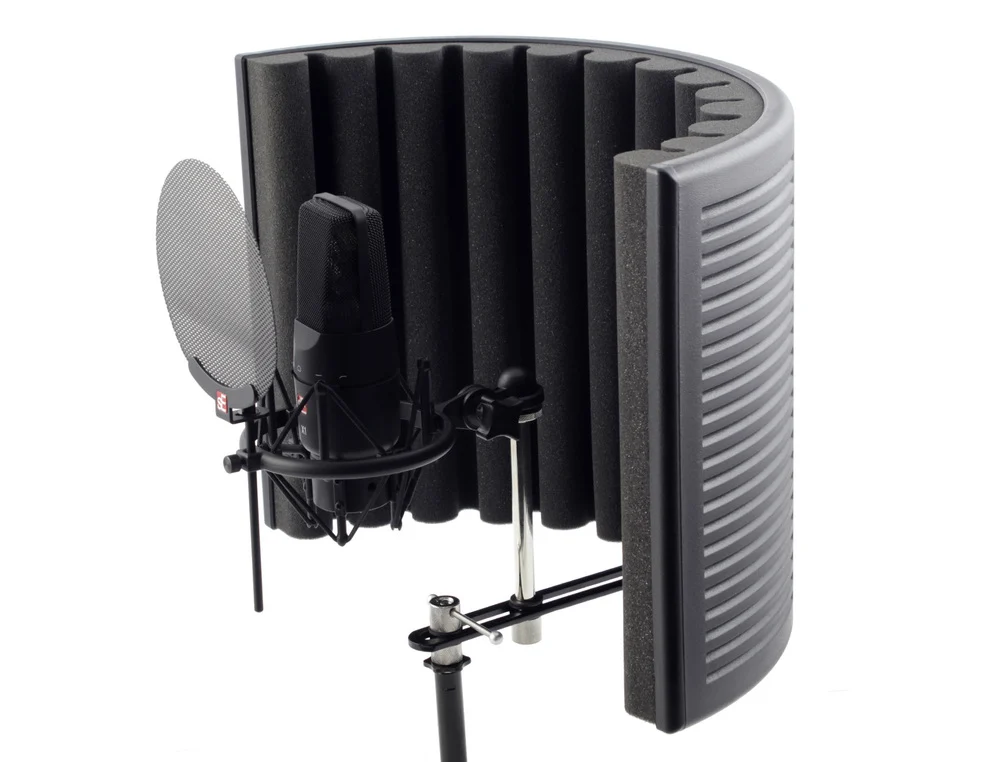
The persistent query, "Do I need a sound reflection filter in my home studio?" echoes through the digital corridors of audio production communities, a question frequently posed to mentors and seasoned professionals alike. This article aims to provide a definitive answer by dissecting the fundamental principles of home recording environments, microphone technology, and the actual efficacy of acoustic reflection filters. The pursuit of pristine audio quality in a home setting hinges on understanding how sound behaves and how microphones capture it.
The Core Purpose of a Home Recording Studio
At its heart, a home recording studio is designed to create a controlled, consistent, and isolated acoustic environment. The primary objectives are threefold: to prevent external sounds from infiltrating the recording space (sound ingress), to ensure that sounds generated within the studio do not escape (sound egress), and critically, to minimize the detrimental impact of unwanted sound reflections bouncing within the room and reaching the microphone. Achieving this ideal state requires a strategic approach to room treatment and equipment selection.
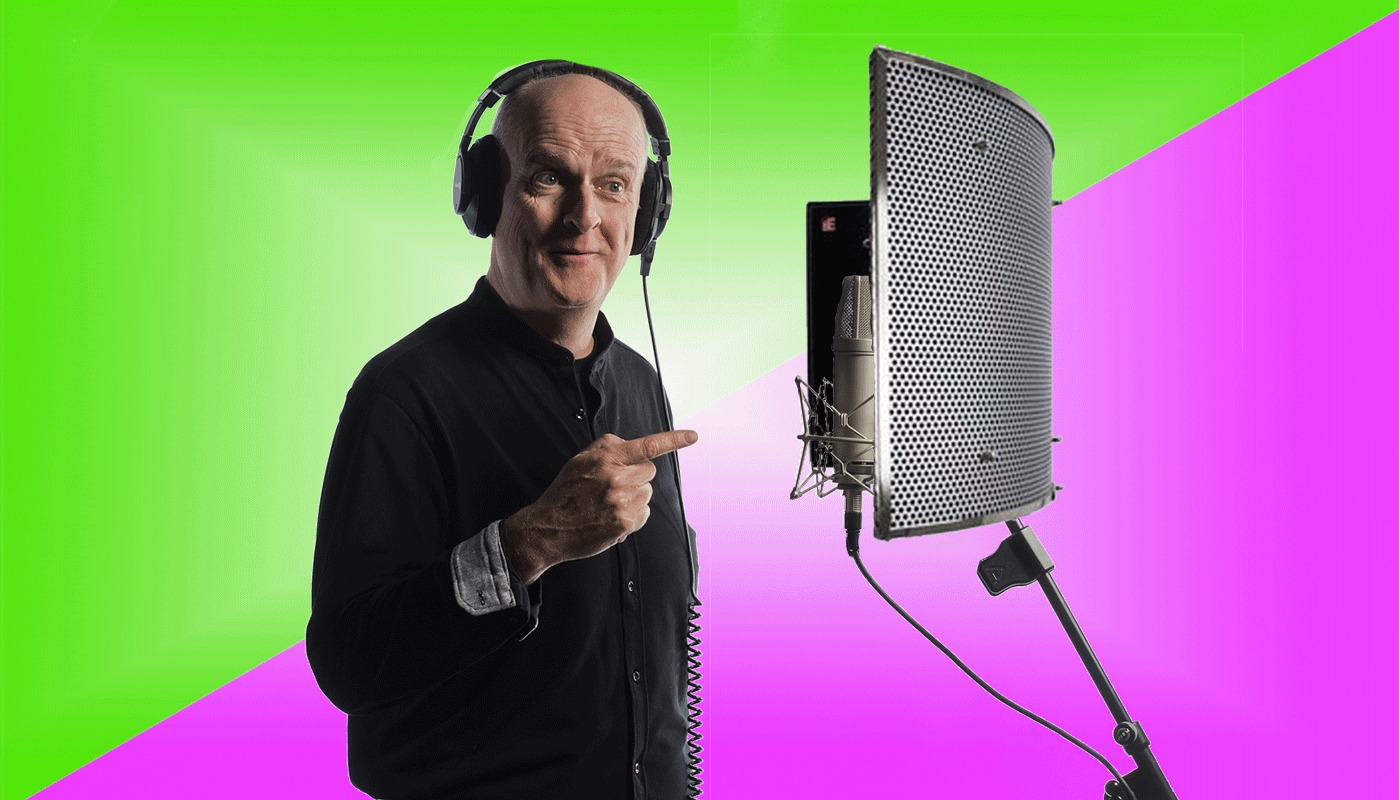
Understanding Sound Reflections and Their Impact
Sound, as a wave phenomenon, interacts with its surroundings. When sound waves encounter hard, flat surfaces – such as walls, ceilings, floors, or even flat furniture – they reflect, much like light off a mirror. These reflections, often termed "room tone" or "reverberation," can significantly degrade the clarity and fidelity of a recording. In a vocal recording, for instance, these reflections can cause a "boxy" or "muddy" sound, masking the nuances of the performance and introducing unwanted coloration. The ultimate goal in acoustic treatment is to absorb or diffuse these reflections, ensuring that the microphone captures only the direct sound source – the voice, instrument, or other desired audio.
Methods for Mitigating Sound Reflections
Various techniques and materials are employed to combat unwanted sound reflections. The principle behind these methods is either to absorb sound energy or to diffuse it, preventing it from bouncing back directly to the microphone.
- Absorption: Soft, porous materials excel at absorbing sound waves. Examples include thick curtains, heavy blankets, acoustic foam panels, and upholstered furniture. These materials convert sound energy into heat through friction as the waves pass through them.
- Diffusion: Diffusers scatter sound waves in multiple directions, breaking up strong reflections and creating a more even acoustic field. Irregular surfaces, such as strategically placed bookshelves, specially designed acoustic diffusers, or even textured walls, can contribute to diffusion.
While makeshift solutions like hanging duvets or strategically placing furniture can offer some improvement, they are often less predictable and effective than purpose-built acoustic treatments. The adage that "a picture tells a thousand words" is particularly relevant when considering the visual appeal and perceived effectiveness of commercially available reflection filters.

The Rise of the Reflection Filter
Acoustic reflection filters, often seen in marketing materials and online tutorials, typically consist of a semi-circular or curved shell lined with acoustic foam. They are designed to mount onto a microphone stand and encircle the microphone, ostensibly creating a localized, acoustically treated zone around the recording source. Brands like Auray and sE Electronics have been prominent in this market, offering products that visually promise to isolate the microphone from room reflections.
The common setup involves placing the microphone within the central cavity of the filter. The underlying assumption is that this barrier will effectively prevent ambient room sound and reflections from reaching the microphone’s sensitive diaphragm. However, a closer examination of how microphones capture sound reveals a more complex reality.
The Crucial Role of Microphone Polar Patterns
The effectiveness of any acoustic treatment, including reflection filters, is intrinsically linked to the microphone’s directional characteristics, known as its polar pickup pattern. Microphones are not omniscient sound recorders; they are designed to be more sensitive to sound originating from specific directions. Understanding these patterns is paramount to understanding why reflection filters may not perform as advertised.
The principal polar pickup patterns include:
- Omnidirectional: This pattern captures sound equally from all directions, creating a 360-degree listening sphere. While providing a natural sound, it is highly susceptible to room reflections and ambient noise.
- Cardioid: This is the most common pattern for vocal recording. It is most sensitive to sound from the front and progressively rejects sound from the sides and rear. This directional focus helps to minimize room sound.
- Bidirectional (Figure-8): This pattern is equally sensitive to sound from the front and the rear, while rejecting sound from the sides. It is often used for stereo recording techniques or capturing two sources simultaneously.
- Hypercardioid and Supercardioid: These are variations of the cardioid pattern, offering even tighter front-facing sensitivity but with a small lobe of sensitivity directly at the rear.
Many high-end microphones, such as the well-regarded Neumann U87, offer switchable polar patterns, allowing users to adapt the microphone’s sensitivity to different recording scenarios. However, most microphones used in home studios are fixed to a cardioid pattern as a default, recognizing its utility in reducing unwanted room coloration.
Deconstructing the Cardioid Pattern
The cardioid pattern, so named for its heart-like shape when visualized from above, is crucial for isolating the desired sound source. Imagine the microphone at the center of a target. The cardioid pattern indicates that the microphone will pick up the strongest signal from directly in front, with sensitivity diminishing as you move towards the sides and becoming weakest at the rear.
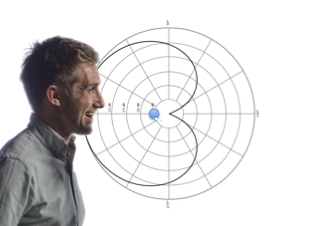
When a voice artist speaks into a cardioid microphone, they are essentially positioned within this directional "bubble" of sensitivity. This deliberate design choice aims to capture the direct sound of the voice while naturally attenuating sound coming from other directions, including reflections bouncing off the room’s surfaces.
The Reflection Filter’s Place in the Acoustic Chain
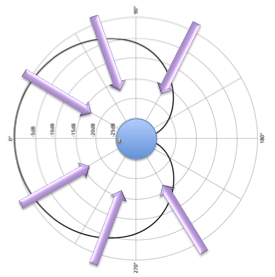
Now, let’s integrate the concept of sound reflections with the cardioid pickup pattern and the presence of a reflection filter. Sound waves, originating from the voice, travel outwards. Some reach the microphone directly, while others bounce off the walls, ceiling, and floor before eventually reaching the microphone.
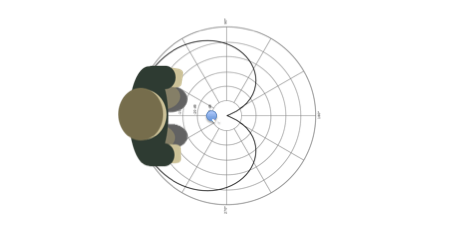
Even with a reflection filter in place, the fundamental physics of sound and microphone directionality remain. The cardioid pattern, by its very design, already rejects a significant portion of sound coming from the sides and rear. Reflections that do reach the microphone primarily do so from the front and sides within the cardioid pickup zone.
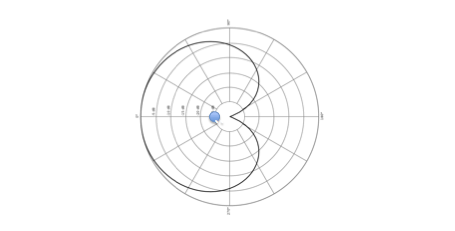
When a reflection filter is positioned around the microphone, it primarily blocks sound from the sides and rear that would not have been captured by the cardioid pattern anyway. The material of the filter itself may offer some minimal absorption of stray reflections that might otherwise enter the limited side-capture area of the cardioid pattern, but its impact on the overall acoustic picture is often marginal.
Visualizations of this phenomenon demonstrate that while sound reflections arrive at the microphone from all angles, the cardioid pickup pattern selectively captures only a portion of these. Introducing a reflection filter, positioned to block the very directions the microphone is already designed to reject, offers diminishing returns. The primary acoustic treatment of the microphone itself, through its directional pattern, often supersedes the localized effect of a reflection filter.
Empirical Evidence and Industry Observations
Numerous audio engineers and voice-over artists have conducted informal and formal tests comparing recordings made with and without reflection filters. The consensus among many experienced professionals is that the difference in audio quality is often negligible, if perceptible at all, when using a cardioid microphone in a reasonably treated space.
The marketing of reflection filters often relies on a visual appeal and the intuitive notion that "blocking sound" must inherently improve audio. However, this intuition can be misleading when the microphone’s own directional properties are already addressing a significant portion of the problem. The filters can, in some instances, slightly alter the high-frequency response or introduce subtle resonances if not perfectly positioned or constructed.
The Unvarnished Truth: Do You Need a Reflection Filter?
Based on acoustic principles and empirical observation, the definitive answer for most home studio users employing cardioid microphones is no, you likely do not need a sound reflection filter. They represent a financial investment that often yields little to no demonstrable improvement in recorded audio quality. For many, they are a well-intentioned but ultimately ineffective accessory.
Why Do They Continue to Be Purchased?
The persistent popularity of reflection filters can be attributed to several factors:
- Inexperience and Misinformation: Newer audio enthusiasts may be swayed by marketing claims or the practices of others without fully understanding the underlying acoustics.
- Visual Appeal and Perceived Professionalism: The filters lend a visual impression of a professional setup, which can be reassuring to beginners.
- Influencer Marketing and Peer Recommendation: Online tutorials and recommendations from individuals who may not have rigorously tested their efficacy can perpetuate their use.
- "Better Safe Than Sorry" Mentality: In the absence of definitive knowledge, individuals may opt for an accessory that seems like it could help, even if its actual benefit is questionable.
It is important to note that while reflection filters are largely ineffective, they generally do not harm the recording process directly. They simply fail to provide the significant acoustic improvement that their marketing might suggest.
The Real Path to High-Quality Home Recordings
If reflection filters are not the solution, what is? The key to achieving professional-sounding recordings in a home environment lies in proper acoustic treatment of the recording space itself. This is a more fundamental and impactful approach than relying on localized filters.
Creating a sound-treated recording space involves addressing the room as a whole. This can range from building a dedicated vocal booth to adapting existing spaces. The principles remain the same: absorb and diffuse sound to prevent unwanted reflections.
- Vocal Booths: These are enclosed structures designed to isolate the recording from the external environment and control internal reflections. They can be constructed from various materials, often incorporating a combination of dense materials for isolation and absorptive materials for acoustic treatment.
- DIY Acoustic Treatments: Even without a dedicated booth, significant improvements can be made by strategically placing absorptive materials. This might include:
- Bass Traps: Placed in room corners to absorb low-frequency build-up.
- Wall Panels: Mounted on walls to absorb mid and high frequencies.
- Ceiling Clouds: Suspended from the ceiling to treat reflections from above.
- Diffusion Panels: Used in conjunction with absorbers to scatter sound.
- Choosing the Right Room: Different rooms have different acoustic properties. Smaller, irregularly shaped rooms with soft furnishings tend to be more forgiving than large, square rooms with hard surfaces.
The "How to Build A Home Studio" webinar, available to members of Gravy For The Brain, offers comprehensive guidance on these techniques. Understanding room acoustics is not merely about buying equipment; it’s about applying scientific principles to the physical space.
Conclusion: Invest in Your Space, Not Just Your Gear
The question of whether to purchase a sound reflection filter for a home studio is best answered by understanding the limitations of such devices and the strengths of alternative acoustic treatment strategies. While the visual allure of a reflection filter may be tempting, the evidence suggests that investing time, effort, and resources into properly treating the recording space itself will yield far more significant and lasting improvements in audio quality. For aspiring audio professionals, the focus should be on mastering the fundamentals of acoustics and creating an environment where the microphone, with its inherent directional capabilities, can capture the purest possible sound.
